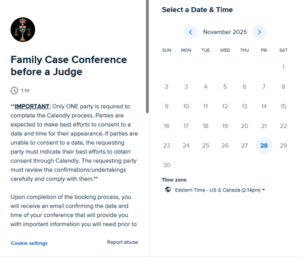
You do not need to have an account to use Calendly. If the matter you wish to schedule with the court is available through Calendly, simply follow these instructions to book and request your appearance:
- Access the appropriate Calendly link for the matter you wish to schedule with the court.
- Refer to the Judicial Regions and Court Locations Using Calendly section to view where Calendly is being used to see if your matter is available through Calendly.
- Select the type of appearance that is consistent with the matter you wish to schedule.
- Ensure you read the left side of the page. It contains important information and requirements specific to the matter you are scheduling.
- Use the calendar on the right side of the page to view the dates and times the court is available for your matter. You must confirm a date and time with all other parties in the matter before completing the Calendly process.
- If all parties can not consent to a date and time for the matter, you must either follow established local practices to secure a date with the court or indicate that parties have been unable to consent to a date when completing your request through Calendly. For local practices, please consult the regional practice directions. Example:

- Select the date and time for your matter.
- Complete all the fields on the page. If you see an “Add Guests” button, select it and include the email addresses of all parties attending the matter.
- You must ensure to check off all undertakings and confirmations. Please review all undertakings and confirmations carefully. You will be expected to comply with them for your matter to proceed.
- Select “Schedule Event”. Calendly will take you to a page confirming that the booking process was complete. Only one party to the action is required to complete the Calendly process (see Tip 1).
Please do not reach out to the trial office after completing the Calendly process to ask for confirmation that it was complete. You will receive a confirmation email from Calendly which contains important information specific to your appearance (to ensure you receive this email, see Tip 6).
If you used the “Add Guests” button, all parties whose email addresses were included in that field will automatically receive Calendly’s emails. If you have scheduled an appearance that did not have the “Add Guests” option, you must ensure you forward all Calendly emails to all other parties in the action (see Tip 5).
Below are some tips to assist you in using Calendly to schedule time with the court.
